

Hey all traveling the Alpha Stamps Design Team Blog Hop and welcome to my little abode in cyberspace.
Sit back, relax, grab your favorite beverage and enjoy.
My name is Caroline Ouzts Hay and this is my first year on the Alpha Stamps design team, but as many of you know I've been hanging out with the gals of Alpha Stamps for quite some time and loving every minute of it. The women of Alpha Stamps have inspired me to grow and learn and helped make me the artist I am today.
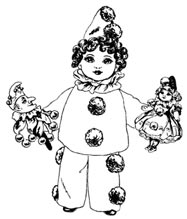
I found Alpha Stamps about five years ago when in search of a Pierrot stamp
(this one, isn't she darling!)
and since then have fallen head over heals in love with everything they have! My favorite themes are Ocean, French, Tea/Coffee, to name just a few off the top of my head.
I like to tell stories with the pieces I create, and frequently it is a book or image itself that inspires me. With a book I love to create new art to depict scenes and the overall emotions that it brings out in a reader. When I set eyes on an inspiring picture I like to make up a story to go along with it.

This is one of the coasters I created for the Bird in Hats Swap (you can sign up now, just click the icon below). We all know the story of Marie Antoinette, well this is the story of two birds that were watching and just might have gotten a little too close.

Constantly the woman of Alpha Stamps stun me with their talent and ideas and I'm looking forward to what is planned in the future. I can't wait to see all the lovely coasters and am thrilled that I am hosting the swap. In the upcoming year I hope to continue to build on the friendships this group has fostered, meet new artist and grow more as an artist.
Now onto the fun stuff, right ;)
Giveaway
A kit, to help you make my "Slices of a Birdhouse"


the kit will include
3 collage sheets, paper, trims, flowers, ribbon and a bird
and arrive to the lucky winner packaged in a hand stamped baggie.


But in order to help you out and for those that may not win. I am going to share some of the techniques I used to create this piece. The following tutorials will appear over the next few days in separate posts to make them easier to find.
How to put together "Slices of a Birdhouse"
to make it easier to see I've opted to use colored cardstock for this tutorial, you of course would use the chipboard houses.


Draw a line down the center of house #2 leaving a 1/4" gap at the top (you will not cut that area)

Draw a line down the center of House #1 a 1/2" long

Now using a matt knife cut along the lines, DO NOT CUT past the lines or your houses will not slip together evenly.

Slip House #2 over House #1 until they fit together snugly.
(You might have to widen your cut on House #2, I suggest sanded it a little)

Now draw a line down the center of House #3

and cut it into two

Now comes the tricky part, you can eyeball this (I did) or get out a protractor.
Twist House #2 until it is roughly at a 45 degree angle from House #1. Glue this into place (I used E6000) and let dry.

Lastly put some glue (once again I used E6000) along the edges of each half of House #3 and place them into the open space (about a 45 degree angle)
All done! Now you decorate.
***
The next thing I would like to share with you is a tutorial I found on Pinterest, tried out, and made a few alterations to suit my purposes and style.
Karen B. of Todolwen made some beautiful Hymn Page Feathers and supplied a wonderful tutorial
Here is an image of Karen's feathers

Alas I had no hymn paper, and Karen's feathers were way to large for me. So what follows are how to make the feathers for the "Slices of a Birdhouse"


Print out or draw your own feathers. The above are the sizes I used on "Slices of a Birdhouse"

Trace the template onto your desired paper and cut the feathers out.
Because my paper was thin, when I went to cut the feathers out I stacked two sheets of paper together and then cut. However if your paper is thicker remember you will need to have a front and back for your feather.

Now it's time to cut some wire.
I used a medium gauge wire but suggest a nice thick one. Cut the wire slightly longer than the feather.

Glue the wire in place and smush the feather pieces together.


Now it's time to really turn it into a feather.
Start cutting downward from the edge towards the wire. I like to make sure the cuts are nice and uneven.

Give your cut feathers a little edge ruffling by running your finger along them and curling the paper in towards the wire.

Karen wrapped her stems with matching paper, I had a really hard time doing that so I decided to wrap my stems in coordinating seam binding. I dipped the wire end into the glue and curled the seam binding around it. Once it was dry I cut off the excess ribbon.

For some reason I distress everything, so the feathers got a quick brushing of tea dye and vintage photo distress sinks.

Not so surprising is that I added glitter. I put a small amount on my finger and ran it along the edge of the feather, then sprinkled the glitter on.

And voila, mini feathers!
Thank you Karen for the wonderful tutorial and the inspiration to make them.
Well gang, that's about it. I know it's long but it's fun!
If you would like to enter my giveaway (winner will be announced June 12th) please leave a comment and a way for me to contact you.
49 comments:
that pink bird is soooooo pretty, love how you made the feathers, thank you for the inspiration
hugs
Love your birdhouse and coaster! Thanks for sharing how you put the birdhouse together and how you made the feathers.
Smiles~
Marilyn
this is a post I will come back to over and over, so much awesome creativity, love the feathers, hugs
What great fun! Lovely work.
Adore the bird house that is being given away. I also love the tutorials on your blog to show how simple it really is to make some of the fabulous creations.
Wow! Love your birdie house...that's one lucky bird! I really like your glitter feathers. Thanks for sharing the directions. Thank you for the chance to win a kit to make my own. :)
blessings, denise
deex355@aol.com :D
What a clever birdhouse! I love the feathers. Thank you for sharing!
Caroline
I am head over heels in love with your project - and you have shared the details! Fabulous!!
Just Beautiful! Thank you for taking the time to show the step by step directions. So thouhtful and inspiring!!
Diane
I love glitter! I am sometimes called the glitter queen. Some probably think I use it too much. I would love a sparkly birdhouse of my own.
fabulous instructions as always. Thank you for sharing.
What a gorgeous birdhouse. So unique. Thanks too for sharing..
I just adore your lovely project and that sweet pink birdie! Thank you so much for sharing your techniques and how-tos.Much appreciated!
You are so creative, love the birdhouses. Thank you so much for sharing the feather tutorial also.
Molly
mollysuzannedonahue@gmail.com
Love the Birdhouse.
barbara Bird
MdStrwbery@aol.com
Caroline, thanks for a great tutorial. I especially liked your book page feathers. Definitely an idea I'll use.
Love your idea for the feathers! Thanks for the inspiration!
I would love to win your kit. Thanks for sharing the feather tutorial also. It's great.
Your kit looks like a fun project. Thanks for demonstrating how to make the feathers. I'm going to try it.
Hi Caroline, Thank you for the great tutorials, the feathers are so clever and the bird houses are so pretty. Thank you.
Wow - thanks for sharing the tutorial! What a great kit for some lucky winner (hopefully me!). Thanks for the chance to win
Very clever - thanks for the wonderful instructions!
Thank you so much for the project! Such awesomeness!!! Love it. . .Nancy
Just so beautiful. Would be nice Wedding centerpieces for guest tables!
Hey Caroline,
What a beautiful project. Lov'in the feathers in your art piece and wow, thank you for the tutorial. Great job!!! Nice Blog too!
Love the 3-D form of the birdhouse, very pretty. And thanks for the feather tutorial - I never would have thought of that :-D
Really love the feathers.Glad to see your tutorial, will try to get back for all of them
thanks so much for the chance to win your giveaway! i would love to play with that kit. thank you also for taking the time to make your tutorial! hugs,
peggy aplSEEDS
Love it! Definitely need to use those flowers on my swap coasters!
Love your Style & would love to win your sweet kit! I can't wait to make some feathers :-)
Oh yes definitely I would love to enter your giveaway. Your art is gorgeous and thank you for all the tips and techniques on your blog. this blog hop is great fun. Birds are my favorite thing to craft in the animal world. thank you
kemperneck70@gmail.com
love , love, love your coaster and the tutorial is wonderful, thanks for sharing :O)
Thanks a lot for the step-by-step. Very clever!
Natural world look out! The scientist naturalist artist is here. Love the paper feathers such a treat.Obrigado
Caroline,
I've seen your work before and you're a very talented lady. Your
little birdhouse is adorable and I
love the feathers (can't wait to try and make some of my own).
Rena
STUNNING!! I adore this little birdhouse and would love to have one for my home! Now if only there were a kit ... (tee hee!)
The entire design team is awesome!! Beautiful works of art that I would be honored to own!!!
Love the papers and the work also love the hop.
You are very creative. Thanks for sharing!! Collette g-cswf66@charter.net
Fun idea for a birdhouse! And I like all you book page feathers, too! Thanks for sharing the idea.
Wow, absolutely beautiful idea and creation. Thanks for the tutorial too.
Wow I comment forever on this bog entry-fantastic!I saw the same feather tutorial and had downloaded the template.It was a little large for my use also.
Love the tutorial on the birdhouse-can't wait to give it a try.Definitely coming back here to visit-I love your style.
I love all the art pieces. This blog hop is so much fun and so very inspiring.
thought I had posted Caroline, but I am getting old, hah! Thanks for your great tutorials, can't wait to try this one. Your work always amazes me and I've enjoyed your glitter comments. A woman after my own heart. :) Theresa Goldman
Wonderful tutorial ~ love those feathers!
Caroline, Love the feather idea, now on my bucket list, and I do have hymn paper!
hugs Lynn
Much like you I love to tell a story with anything I create. Your artwork just rocks! :)
Happy creating,
Birgit
swappinghowdies(at)yahoo(dot)de
Thank you so much for your generosity in sharing your methods! Too many people, including me but glad to say in the past, feel it is not a good thing to share techniques. I love your creations and intend to follow your blog from now on. xo
oh Caroline how do you do all the things you do?
beautiful tutorial and stunning art as always..you are incredible!
susan s.
Post a Comment