Saturday, December 25, 2010

2011 Calender

Another big Circle of Friends project completed. Alas I am a little upset that I didn't do a better job putting these together and I wanted to have time to decorate the calender pages inside but with the new year approaching it's time to call it quits on these and get them in the mail.
January:
Sandy starts us off with a wonderful blue and silver ATC. Everything on this shimmers, a very exciting way to start the year.


February:
We doubled up on a few months and if a member did more than two months one of the ATC's could be digital. This is my digital piece. The main image is from Alpha Stamps. The birds and the perfume bottle are from various Etsy sellers.


March:
This is my second contribution and I love it. For starters the paper is handmade but then I went and covered it with my favorite lily stamp and bunnies, my favorite thing about Easter. I wanted something non religious for this month.


April:
Sandy's second contribution and I think I love it almost as much as her first. In the upper right hand corner she has a glittered squiggle which alas did not photo but really adds to this ATC.


May:
One of Sandi's pieces. The phrase reads "The way to know life is to love many things." -Vincent Ban Gogh. The paper she used is glittery and with the pearl's this is really a lovely ATC.


June:
Andrea's ATC has a ton of fabulous layers. Over the image that is predominant she has stamped and gold shimmer dusted a grid, it really adds to this ATC. She has also highlighted many of the bee's and some random dots with gold ink.


July:
Sandi's second contribution. I absolutely love this patriotic ATC. The blue frame is all glitter and when she added diamond glaze to the image it blended the blue or red, smoothing it out really making the silouet pop even more.


August:
Janice's very first digital ATC and wow did she outdo herself. The words have a wonderful water/shadow effect. If you look carefully you can see a whale's tale diving into the water.


September:
Janice's second contribution. I really wish you all could see this one in person. The flowers are coming through circular cut outs and the poem is on transparency that is sewn on one side so you can lift the other.


October:
Sarette's contribution. Okay so my camera is not great...the color of this is really a deep brick red. The quote reads "One Falling leaf may herald the coming of autumn." It is a Chinese Proverb and perfect for October since many of us live in states that don't get cold until November.


November:
Kathy put together this ATC for November. It is another one where you really need to see it in person. Everything is shimmery and it's done on water color paper so the paint is really wonderful.


December:
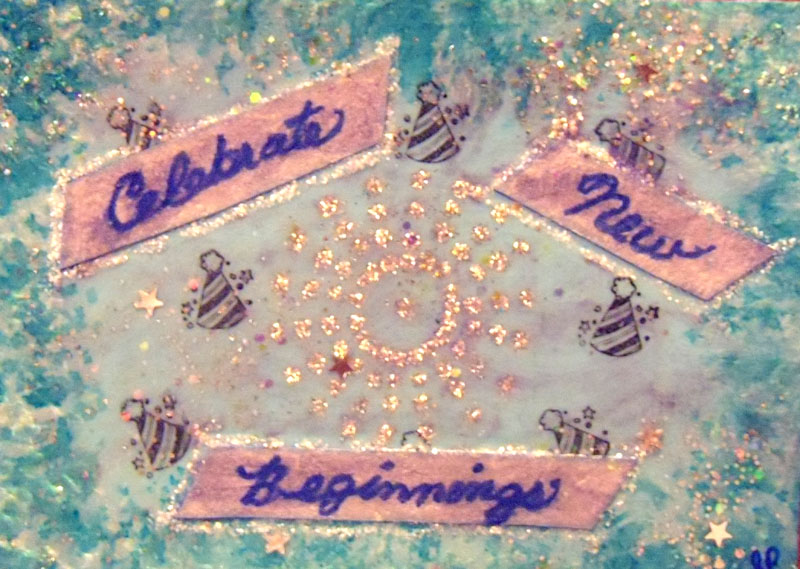
Lynda our newest member did December for us. Each of her's were different, this is the one that I received. I love the hat and the colors all go together so well.
I am so glad that we did this project. This is a great collection of ATC's that I will cherish year in and year out.

Marie Sachets


This year I made sachets for all the women in the family and some other very special friends.
I found the bird themed fabric and was inspired. But first I had to die the bird fabric (it was originally white). I tea died it along with some plain white cotton which I later stamped the Marie image on.

The flowers are very simple and also handmade. I cut 3 different sized circles from a polyester based fabric, then cut slits to emulate petals and finally took a candle and heated the fabric so it melted just a bit forming the natural petal shape. I stacked the 3 circles together and sewed them adding a jem to the inside.
The ribbon along the bottom is also the same as the flowers. I cut a strip, stamping it with french text and butterflies. I sewed this on with three separate lines of stitching that I swerved.

Each sachet is filled to the brim with either lavender (the blue trimmed sachets) or Rose. I really love the way they smell and am very pleased with how they came out. I hope everyone that gets them loves them and gets years and years of yummy smelling lingerie out of them ;)

Marie Stocking

One of my favorite things to do at Christmas Time are Secret Santa swaps. Marie Antoinette Mail Art group did a Secret Santa Stocking Swap.


This is the stocking I made. There were a few restrictions. it could only be Ivory/Cream, Brown, Gold or Silver and it needed to be Marie inspired.


I purchased a pre made stocking (if I ever do something like this again I'll just make the stocking) and tea died it. I also tea died some lace and cotton fabric at the same time.


The main feature on my stocking is the Eiffel tower which I printed on fabric. I added some gold chiffon as a trim and hid the sew line with gold sequins. Yes, I had to hand sew the sequins on.


The flowers are a find. They were in the iron on section at Joanne's. However they are not really iron on's since they too have chiffon on them and it would melt if I used the heat needed to affix these to the stocking. I did use some heat, glue and sewed them on randomly all over the stocking.


The hardest part, but the first thing that came to my mind when designing the stockinng is the cuff. I wanted the layers of chiffon to be a little bit more crinkled/fluffed (more like the way it is around the Eiffel tower) but overall I do like how it turned out.


Each layer is longer than the one above it so the cuff really is quite thick. To hide the sew mark and all the extra fabric I affixed the wonderful gold tree ribbon.


Under the cuff I placed the tea died lace as my final touch. Then all I had to do was fill the stocking. Again there were some limitations, money amount and at least one item needed to be a Marie item.


I decided to make a Marie ornament. However all the images I had were a little large for just one square ornament. When I was playing with placement I realized that the ornament cut off right at her head (how apropriate is that!) So I decided to attach two squares and have her head in one and body in the other.


I trimmed her and affixed her to a lovely cold paper and then added a cup cake, vines and a bit of hair bling before closing it up and adding glitter all around the outside. I also added a fleur de lis and a mini Eiffle Tower. The finishing touch is the ribbon and when you flip it over the same Eiffle tower from above is on it.


Some of the other goodies I put inside are in the image below. I do hope that the person receiving my stocking enjoys it and everything I put inside.


Thursday, December 16, 2010

Christmas Past, Christmas Present


This week over at One Powerful Hour the theme is...

Christmas Past, Christmas Present

The hostess Pauline instructed participants to take the title anyway they saw fit.

So, last year at around this time (Christmas time) I decorated a chipboard bird and have had it up in my studio all year (See Image below). So I decided to decorate the other side.

To start I used a paper that I received last year from Wendy at Repeat Impressions. I love this paper so much but didn't know what to do with it, I really just wanted to frame it and look at it but I thought this would be just as good. Next I Green Tinsel embossed a fir tree branch all over (also from Repeat Impressions). This year (to represent Christmas Present) I used the Cat German Scrap that I received from Paula's Kit club. My finishing touched include changing the cat bows to red and adding red rhinestones all around the bird.

I think I represented things received in my Christmas past and my Christmas Present fairly well. I hope you enjoy.

Sunday, December 5, 2010

Gift


This week One Powerful Hour has set the theme of...

A Gift

Unfortunately I don't have time to make a special piece for this wonderful theme, However I wrapped some very special gifts recently and used my own design.

These are my gifts for the 6 Day's of Divaness. We are a group of ladies that share a love of reading and chatting and of course shopping. This year for our Christmas swap we are exchanging 6 gifts. We open a different gift each day so they have to be labeled.

I decided to label mine by using Glimmer spray through stencils. But on top of that I glittered clothespins (that are also magnets) and attached the appropriate number of them to each package.

I consider the Diva's a gift in my life along with the design team of One Powerful Hour and many many others...

Monday, November 22, 2010

Marie's Christmas Poinsettia

A few weeks ago I was invited to join a fabulous group of artist known as the Marie Antoinette Mail Art group. Of course I jumped at the opportunity and this is my first project for them, Christmas themed ATC's featuring Marie of course.

I did not own a single Marie stamp when I joined the group. It took me about five minutes to locate this one from Cherry Pie and fall in love with it.

Originally I was going to go with mostly white but DH said I should do more traditional colors since I was not using a true image of Marie. The background paper is cream and gold stripes with gold flourishes. I green tinsel embossed the image of Marie directly onto the paper and stamped her onto a separate heavy weight cardstock. I colored the image with colored pencils and cut out the face portion. Painting the flowers with twinkling H2O and adding gold glitter to the flower centers.

The poinsettia is from Repeat Impressions, I stamped it three times on heavy cardstock and painted it with the same red twinkling H2O, trimmed them closely (one of them I cut off the larger petals) layered them and curled the petals.

The finishing touches include 1/4" strips of red crepe paper crinkled and taped down, leaves spritzed with shimmer and a rhinestone holding the poinsettia layers together.

Overall I am pleased with this ATC and I hope the recipients are also. I've never been so nervous in my life...well maybe the first swap with COF :)

Saturday, November 13, 2010

London 1900


It's another fabulous Circles of Friends swap. This time we tackled Steampunk, not so sure it's our thing but we are all glad we took a stab at it.

My last attempt at Steampunk I went with a city scape and tons of metal, sprockets and wire this time I wanted to go a bit more feminine.
The background is one of my acrylic washes, this one in blue then accented with gold twinkling H2O's (my photo sucks which upsets me b/c I already packed up the pieces so I can't take another one). Next I stamped the image and then went about embellishing her.

The words and sprockets are from Oxford Impressions. I gold embossed the sprockets and then added the rhinestones for her necklace. Originally i was going to add a miniature watch part on top of the gems but in the end I liked the piece better without it.


I made her goggles from some findings in the jewelry making section of Michael's that I painted gold with acrylic paint. Once they were dry I glued them on and added diamond glaze inside so it looks like real glass.

Her hairpiece is a gold wing for jewelry making that I added a paper flower to. I enhanced the flower with a bit of gold ink.

The finishing touches include aging the edges of the ATC and affixing the words with 3D tape.

Saturday, November 6, 2010

COF Journal Returns

Last week I got my 2010 Circle of Friends Journal returned and oh my are the contributions spectacular. This year I provided collage images with the theme of Cinderella and/or Sleeping Beauty. Participants were to create a piece using these collage images and one of two castle templates. HERE is the link to my book before I mailed it off this year. Elisabeth is the only COF member to use one of the fabulous Sleeping Beauty images.


Andrea altered the shape of the template when she added a sky which I think it totally awesome and I'm considering doing something like the for the front and back cover of the book (still to come).


The texture on this caste is really incredible, I'm note quite sure what she used but I plan on finding out.


Nancy used one of my favorite images. When I did this as an Alpha Stamp swap HERE is the piece I came up with using this image.


This piece also has some great texture, there is clear embossing, glitter, sand and a very fine clear crackle coat over the image. All the different textures really add some great detail and interest.


Janice portrayed the ugly stepsisters instead of Cinderella and I just love what she has done. I think she printed out the story onto the card stock (if not she has fabulous handwriting and can keep a straight line perfectly).


The sisters and the topiary are 3Ded and all the cutting is perfect. The overall neatness of the piece is one of the draws...that and its just plain perfect!


Sandi, our fearless leader decorated both the front and the back (I posted them out of order).


The front (below) is of Cinderella cleaning and to me dreaming of the ball while the back is her fleeing from the ball. It like she told the entire story in only two piece which is great.


the backgrounds are wonderful the front page is paint splattered and has texture and the back is a gorgeous garden.


Sandy really went all out! Glitter thread sewn all the way around the castle and more glitter highlighting some of the background paper features.


The image she used is one of my all time favorites.


Last but certainly not least Cheryl's contribution. I just love the black and white image and paper she selected and then offset with the most gorgeous fabric applique...It adds so much!


Well, that's my journal pages...now I need to get cranking on making some of my own and making the front and back cover. So this project is far from done.


Thanks for looking!

Thursday, October 28, 2010

Witches List

This week I set the theme at One Powerful Hour...it's basically a Halloween theme so anything goes.

A few years back my sister gave me this fabulous stamp and I've never really used her. But given only an hour to create a piece I decided she would be a great subject.

I stamped her on white paper and colored her using colored pencils then cut her out, emitting the original scroll that she held.

I keep all my scrap papers from previous projects so I dug out a book print that I had previously aged using Tim Hotlz inks added a bit more ageing along the edges.

The hard part was putting it all together. She was now in three pieces. So I found a background paper I liked and stamped her on it then glued the one I had colored on top of that. Fitting the scroll into place.

I really liked the way she turned out and by stamping the image onto the background paper I got to keep things that I previously cut out. To finish it off I added diamond glaze to the various spiders, bats and toads.

Monday, October 25, 2010

Red Velvet Art...

This is one of those bitter sweet (and not because the recipe calls for bitter sweet chocolate) posts. The Circle of Friends have completed another wonderful round of journals. This is the last entry I will do for this year...but I already have plans for next years journal ;)

Elisabeth wanted some yummy recipes to fill her journal. After all what goes better with art than food (and wine). So I pulled out my favorite cupcake recipe. Red Velvet Cupcakes. My recipe is very different than most and oh so yummy!

For the background I used two shades of acrylic paint. When they dried I stamped Patisserie, a Paula's Kit club stamp, in white all over. Next I stamped the mini cupcakes added glitter and painted the bottom portion with a Twinkling H2O.


The lovely retro lady and the cherries are also stamps I have received from Paula's Kit Club. I colored them with colored pencils, cut them out and attached them as shown. The recipe is printed on transparency film and affixed with a clear glue.

To finish it off I cut out a few mini cupcakes (painted and glittered like the others) and filled up the woman's tray.

I had a fun time making this piece and really like how it turned out. I could have kept adding and adding but I was already behind on mailing out this journal. I hope Elisabeth thinks it was worth the wait.