Friday, June 8, 2012

Foil Texture Without an Embossing System ~ Tutorial


A few weeks ago I bought some foil tape to use on the roof of this house journal. When I got it home and read the instructions I realized that I don't have (nor do I want to buy) an embossing system and that there had to be a way to get texture without an embossing system.  So I started testing different techniques and boy did I come up with a bunch, this is only one, I will share the others over the next few weeks.


Supplies
Foil Tape
Thin Cardboard (like a cereal box)
Scissors
Glue
pen
Alcohol inks
Blending solution
Crackle Medium (Rangers Crackle accents)
rag


Step 1:  Decide what kind of pattern/texture you would like.  I am doing a roof so I decided on a scalloped edge that I would stack on top of one another.  Measure and draw out your design and then cut it out.


Step 2:  Glue your texture together


Step 3:  Trace and cut out the cardboard to the desired shape


Step 5:  Cover the Texture piece with foil tape


Step 6:  Press down the foil tape onto your texture piece making sure to bring out all the curves.  Be careful not to scratch the foil, use your finger tip NOT your nail. 


Step 7:  Trim around the shape leaving about an 1/8th of an inch to curve around to the back of your textured piece.


Step 8:  Gather your Alcohol inks and blending solution.


Step 9:  Apply Alcohol inks directly to the foil, let it run together


Step 10:  To ensure all the silver is covered pounce on the alcohol ink but DO NOT use any blending solution.


Step 11: OPTIONAL  I wanted a bit more texture so I covered my piece with Crackle Accents


Step 12:  OPTIONAL Because I added the crackle accent I decided to do another layer of Alcohol ink to fill in the cracks. 


Apply the ink directly to the piece and quickly wipe it away, if you get too much apply a bit of blending solution to a rag and wipe it away.  Be very careful here because the cracks go all the way through and if the blending solution reaches the color it will spread it and water the color down.


And that's that.  All done.  Yes I know that running the foil sheets through a machine is much easier but if you don't have an embossing system this is a way to achieve a nice look. 

Hope you Enjoy!

Wednesday, June 6, 2012

Meet the Alpha Stamps Design Team Blog Hop!


Hey all traveling the Alpha Stamps Design Team Blog Hop and welcome to my little abode in cyberspace. 

Sit back, relax, grab your favorite beverage and enjoy.

My name is Caroline Ouzts Hay and this is my first year on the Alpha Stamps design team, but as many of you know I've been hanging out with the gals of Alpha Stamps for quite some time and loving every minute of it.  The women of Alpha Stamps have inspired me to grow and learn and helped make me the artist I am today.

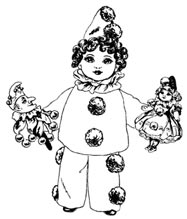
I found Alpha Stamps about five years ago when in search of a Pierrot stamp
(this one, isn't she darling!)


and since then have fallen head over heals in love with everything they have!  My favorite themes are Ocean, French, Tea/Coffee, to name just a few off the top of my head. 

I like to tell stories with the pieces I create, and frequently it is a book or image itself that inspires me.  With a book I love to create new art to depict scenes and the overall emotions that it brings out in a reader.  When I set eyes on an inspiring picture I like to make up a story to go along with it. 


This is one of the coasters I created for the Bird in Hats Swap (you can sign up now, just click the icon below).  We all know the story of Marie Antoinette, well this is the story of two birds that were watching and just might have gotten a little too close. 


Constantly the woman of Alpha Stamps stun me with their talent and ideas and I'm looking forward to what is planned in the future.  I can't wait to see all the lovely coasters and am thrilled that I am hosting the swap.  In the upcoming year I hope to continue to build on the friendships this group has fostered, meet new artist and grow more as an artist.

Now onto the fun stuff, right ;)

Giveaway

A kit, to help you make my "Slices of a Birdhouse"


the kit will include
3 collage sheets, paper, trims, flowers, ribbon and a bird
and arrive to the lucky winner packaged in a hand stamped baggie. 


But in order to help you out and for those that may not win.  I am going to share some of the techniques I used to create this piece.  The following tutorials will appear over the next few days in separate posts to make them easier to find.

How to put together  "Slices of a Birdhouse"
to make it easier to see I've opted to use colored cardstock for this tutorial, you of course would use the chipboard houses.


Draw a line down the center of house #2 leaving a 1/4" gap at the top (you will not cut that area)


Draw a line down the center of House #1 a 1/2" long


Now using a matt knife cut along the lines, DO NOT CUT  past the lines or your houses will not slip together evenly.


Slip House #2 over House #1 until they fit together snugly.
(You might have to widen your cut on House #2, I suggest sanded it a little)


Now draw a line down the center of House #3


and cut it into two


Now comes the tricky part, you can eyeball this (I did) or get out a protractor. 
Twist House #2 until it is roughly at a 45 degree angle from House #1.  Glue this into place (I used E6000) and let dry.


Lastly put some glue (once again I used E6000) along the edges of each half of House #3 and place them into the open space (about a 45 degree angle)

All done!  Now you decorate.

***

The next thing I would like to share with you is a tutorial I found on Pinterest, tried out, and made a few alterations to suit my purposes and style.

Karen B. of Todolwen made some beautiful Hymn Page Feathers and supplied a wonderful tutorial

Here is an image of Karen's feathers


Alas I had no hymn paper, and Karen's feathers were way to large for me.  So what follows are how to make the feathers for the "Slices of a Birdhouse"


Print out or draw your own feathers.  The above are the sizes I used on "Slices of a Birdhouse" 


Trace the template onto your desired paper and cut the feathers out.
Because my paper was thin, when I went to cut the feathers out I stacked two sheets of paper together and then cut.  However if your paper is thicker remember you will need to have a front and back for your feather.


Now it's time to cut some wire. 
I used a medium gauge wire but suggest a nice thick one.  Cut the wire slightly longer than the feather.


Glue the wire in place and smush the feather pieces together.


Now it's time to really turn it into a feather. 
Start cutting downward from the edge towards the wire.  I like to make sure the cuts are nice and uneven.


Give your cut feathers a little edge ruffling by running your finger along them and curling the paper in towards the wire.


Karen wrapped her stems with matching paper, I had a really hard time doing that so I decided to wrap my stems in coordinating seam binding.  I dipped the wire end into the glue and curled the seam binding around it.  Once it was dry I cut off the excess ribbon.


For some reason I distress everything, so the feathers got a quick brushing of tea dye and vintage photo distress sinks.


Not so surprising is that I added glitter.  I put a small amount on my finger and ran it along the edge of the feather, then sprinkled the glitter on.


 And voila, mini feathers!
Thank you Karen for the wonderful tutorial and the inspiration to make them. 

Well gang, that's about it.  I know it's long but it's fun!

If you would like to enter my giveaway (winner will be announced June 12th) please leave a comment and a way for me to contact you. 

Tuesday, June 5, 2012

Strawberry Crepe Cupcakes with Hazelnut Buttercream Frosting


For every special occasion a little girl deserves a special cupcake.  My oldest had a picnic at school that had a special reminder not to forget desert.  So I didn't! 

Kayde loves Strawberries, if she could she would eat nothing but strawberries and she has fallen in love with my new way of making frosting.  So this is what I came up with for her.

Strawberry Crepe Cupcakes
1 1/4 cup flour
3/4 cup sugar (and more for strawberry's)
1 1/2 tsp baking powder
1 tsp salt
1/2 cup butter, softened
1/2 cup plain Greek yogurt
2 eggs
1 1/2 tsp vanilla extract
12 strawberries
lemon juice
cornstarch


Pre-heat oven to 350 and line cupcake tin with wrappers

Cut strawberries and heat them with a tiny bit of lemon juice, a tablespoon or 2 of sugar, a small amount of cornstarch (sifted).  Heat until the mixture thickens.  Sorry I do this all my sight and taste, don't be afraid to taste it!  You want to make sure you get the right amount of sugar.

Whisk butter, yogurt, eggs and vanilla together

In a separate bowl mix flour, sugar, baking powder and salt.  Slowly add this to the wet ingredients stirring constantly.

Fill cupcakes 1/4 full, Spoon in strawberry mixture, top with remaining batter

Bake 20-25 minutes

Hazelnut Buttercream Frosting
1 1/2 cup sugar
1/3 cup flour
1 1/2 cup whole milk
1/3 cup heavy cream
1 1/2 cup butter at room temp.
1 tsp vanilla
3 tablespoons Nutella

In a saucepan whisk flour and sugar together (sift flour first), add milk and cream, cook over medium heat until boils and thickens

Transfer to a bowl and beat on high until cool (about 10 minutes)

Turn mixer to low and add butter a little at a time, when all in increase the speed and beat until light and fluffy

Add Vanilla and Nutella and mix until incorporated


As an added bonus, and because I had left over strawberries, I topped the cupcakes with chocolate covered strawberries.  I think this was my daughters favorite part.

Monday, June 4, 2012

Art Share ~ Stamp Out Crime

A few weeks ago a friend of mine invited me to join a new group she was creating.  How could I resist a group that makes ATC's based on mysteries???  Well, I didn't.  And I have a bunch of fabulous returns to share.  If you would like to see my creation for this swap it is HERE

The above creation is by Sarette, the fabulous creator of the group, she is portraying The Crossword Murder by Nero Blanc (pictured below)


A very puzzling mystery... with six crosswords included! That's right-Thompson C. Briephs is dead. D-E-A-D. The body of the flamboyant crossword editor was found under very suspicious circumstances-and now it's up to private investigator Rosco Polycrates to come up with some answers, with the help of the beautiful and brainy crossword editor from the victim's rival newspaper. They'll need to look everywhere-including up, down, and across-to stop the killer from striking again...

I love a good crossword puzzle so I think this book is going to have to be added to my To Be Read pile. 

Friday, June 1, 2012

Pinterest Find ~ Painted Vases


Okay, I'll admit it, I am addicted to Pinterst and don't think it is a bad thing.  Inspiration is something all artists need and looking through thousands of gorgeous pictures is a perfect way to find inspiration.

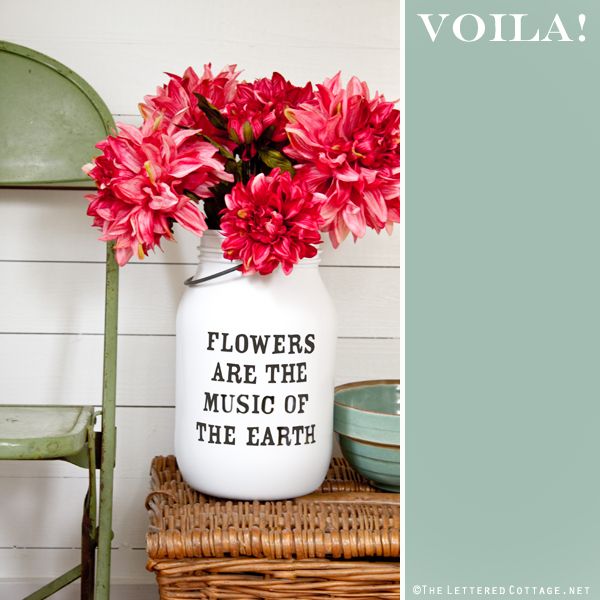
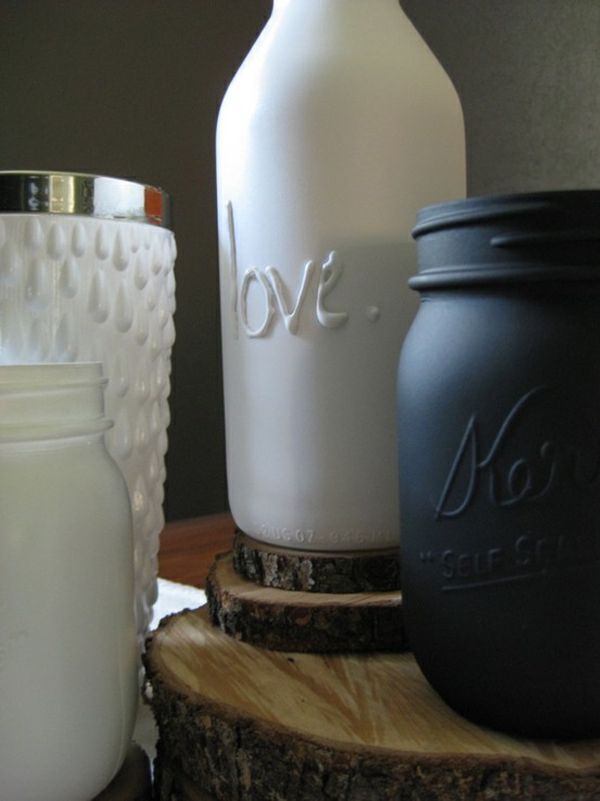
I absolutely fell in love with the jar above.  It was created by Layla at The Lettered Cottage as a pinterest challenge.  She was inspired by the photo below. 


(Photo & Project: Brooke of Pure and Noble)

Using Layla's instructions (found on her blog) I decided to make my own. 


I used a large jar that was originally filled with artichoke hearts and changed the phrase.  The stickers did come off very easily and I am pleased with the outcome. 

I made a second one for the holiday's used snowflake stickers and the words "Let it snow".  I didn't get the stickers quite stuck to the glass enough and to fix the problem I ended up taking a blade and scratching off the paint (It looks fine).  However I decided to spray the paint outside and it was a bit too cold and the paint didn't go on smoothly.  I was planning on sending it as a gift but ended up keeping it due to the mistake.  I ended up tying a light blue, wide ribbon, around the jar mouth and letting the ends trail over the mistakes.