

On the First Day of Christmas my true love gave to me a
Partridge in a Pear Tree
How could I resist when Alpha stamps said,
"This year in December we are doing the 12 Days of Christmas."
To me this is the ultimate holiday song and perfect for all types of art. So please enjoy Straight No Chaser's rendition of the 12 Days of Christmas as you view my offering.

But what the heck is a Partridge anyway?
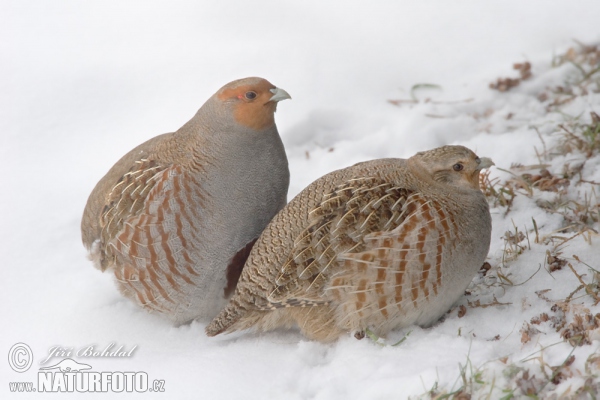
Those are Grey Partridges, and let me tell you they are hard to find in the art world. So I took some liberties.

This is my tree, you might have seen something similar on Pinterest by Pikadilly Charm, they created a fall tree.
I wanted mine to look covered in snow so I spray painted it with a glossy white. I also wanted it to be more controllable so I wound wire in with my limbs, 28 guage craft wire.

To create the base of my piece I used
2 of the small (3-1/2" diameter and 2" tall)
Layer cake paper mache boxes
Layer cake paper mache boxes
I painted them using the
Gold and Silver Paint Dabbers
Gold and Silver Paint Dabbers
and then crackled then with Kroma Crackle

Since I knew a Partridge would not be making an appearance in my piece, he is off checking out all the of the other days, I made him a nest to come home to after his long travels. The nest is made of Silver craft wire I used some beads from the Cream Pearl Mix in a Tin for the eggs.

The nest was made possible by another fabulous Tutorial I discovered on Pinterest by Just Something I Made.
A quick side note: I never take credit for someone else's work or ideas. I strive to make it mine. I did a tutorial on just this a few months ago, please take inspiration from all the artists out there and make it yours. You can view my Making It Yours Tutorial HERE
A quick side note: I never take credit for someone else's work or ideas. I strive to make it mine. I did a tutorial on just this a few months ago, please take inspiration from all the artists out there and make it yours. You can view my Making It Yours Tutorial HERE

Check it out, do you see that color???
Yep you guessed it my lantern lights up!
I drilled into the Pagoda Hanging Lantern and inserted the LED light. The wires run down the lantern poll and the battery pack is inside the box, it takes 4 AAA batteries.
Yep you guessed it my lantern lights up!
I drilled into the Pagoda Hanging Lantern and inserted the LED light. The wires run down the lantern poll and the battery pack is inside the box, it takes 4 AAA batteries.

Unlit, pretty but not as much fun.
On top of the LED with battery pack that I used, the tree is filled with Fairy Lights - Fiber Optic Cables. So when the Partridge comes home he can snuggle in his nest surrounded by hundreds of miniature warm lights.
I wrapped the post in 2 mm silk ribbon in Oyster
and added Diamond Stickles. Actually I put Diamond Stickles everywhere.

Some other supplies that I used are:
Pear Shaped Window Beads
Pear Shaped Window Beads
Clear Acrylic Bead Sprays Wheat
2mm silk ribbon Buttercup
Pearlized Mica Flakes
Brass Pear Charms
Tiny Wrapped Packages 1/2 Inch
2mm silk ribbon Buttercup
Pearlized Mica Flakes
Brass Pear Charms
Tiny Wrapped Packages 1/2 Inch

Now onto the fun part, see those pears, they are Creative Paperclay!
How to Gold Leaf Paper Clay

Supplies:
Adhesive Size
paintbrush
paper clay items

I choose to start this tutorial once my paper clay pieces were done Laura at Artfully Musing has a wonderful tutorial on how to create molds and use paper clay. My video also has more details.

Follow the directions on your gold leaf, some gold leafing does not need adhesive size.

If it calls for it, shake the bottle and paint it on where you want the gold leaf to stick.

Cover your paper clay piece with gold leaf. Use a brush to gently get the leafing into all the crevices and to wipe away any excess.

Don't throw away the left over gold leaf. Put it back into the package (or into a box/bag) you can use the smaller pieces to fill in holes that sometimes occur.

To finish off the pears I used a paint that has a fabulous shimmer for the stems.

All done! You'd never know they are paper clay.
The video below has more details and more instructions.
Hope you learned something, thanks for stopping by!
One the Second day of Christmas...
You will just have to wait and see!
11 comments:
Loved listening to music while browsing your post. Fantastic job.The pears are my favorite!
Great job. Love it all. Becky
Oh my gosh Caroline this is fabulous and so beautiful. Thanks for sharing and I love your art.
hugs
susan s.
ADORE those golf leaf pears. They're wonderful!
Great project and great tutorial! The lighted lantern is awesome!
The music was the perfect finishing touch to your post!LOL Loved it your project and your tutorial.
hugs Lynn
Caroline, you stay up nights, don't you, you must to come up with these uniquely beautiful designs!
I LOVE your pear tree OMG! How incredible and creative - well that just doesn't do it for this fabulous creation! The music is same, I just posted on my Fbook to share further. Thanks for the delightful post!
What a clever project! The little silver nest is just precious. Looking at the lamp post reminded me of the commercial for that hotel chain..."We'll leave the light on". Thanks for sharing.
This is fabulous, thank you for sharing your project.
Quite a work of Art, so cute, can't
wait to see what the next 11 days bring. Yea, partridges are not all that easy to find, but your pear tree is great, maybe you could find a small pic of a partridge, and adhere it to cardboard or stock.
Love that silver nest, so adorable.
Blessing for a very Merry Christmas,
Nellie
Post a Comment