Wednesday, September 5, 2012

Vintage Witch Nut Cup ~ Tutorial

 
Here is another Nut Cup creation.  This one I really like because the hat is hinged on, so you flip it up and can fill the inside with goodies.  This little jem only took me about an hour.  So while the tutorial may be long, the finished product will probably take you less time LOL.
 
 
Clearly I went with a more vintage grungy theme than the traditional Halloween on this one.  I'm not sure which I like better.
 
 
You can't fit much in the little cup, but that doesn't mean what it gets filled with won't be fantastic.
 
 
Basic Supplies
Nut Cup
Paint
Paper
Collage Image
Glue
Ribbons, trims, rhinestones
Circle cutter
Inks
Cheesecloth
 
 
Start by painting the inside and outside of your nut cup
 
 
Next cut out the base of your witches hat (mine was about 2") and the cone (double the base).
I used a colluzle to do this (yes, I am aware of how behind the times I am sigh...) but anything that cuts a circle will work
 
 
Now find the center of your cone (the larger circle) and cut from the center to the edge (see below)


Now twist your circle into a cone shape (the extra paper at the bottom can be cut off later)
 
 
Glue along the seam.  I used a paperclip to hold the shape until the glue dried. 
 
 
Now gather a few items to "grunge" up your piece and cut a piece of cheesecloth, grunge it up too.


Next lets attach the hat base to the cone.  You can eyeball it or trace around whichever works for you.  Place glue on the base and hold your cone in place for a few seconds. 


While that is drying lets decorate the nut cup itself.


Find an image and cut it out, affix it to the nut cup (I used rubber cement) cutting off any excess and rounding the top of the image.
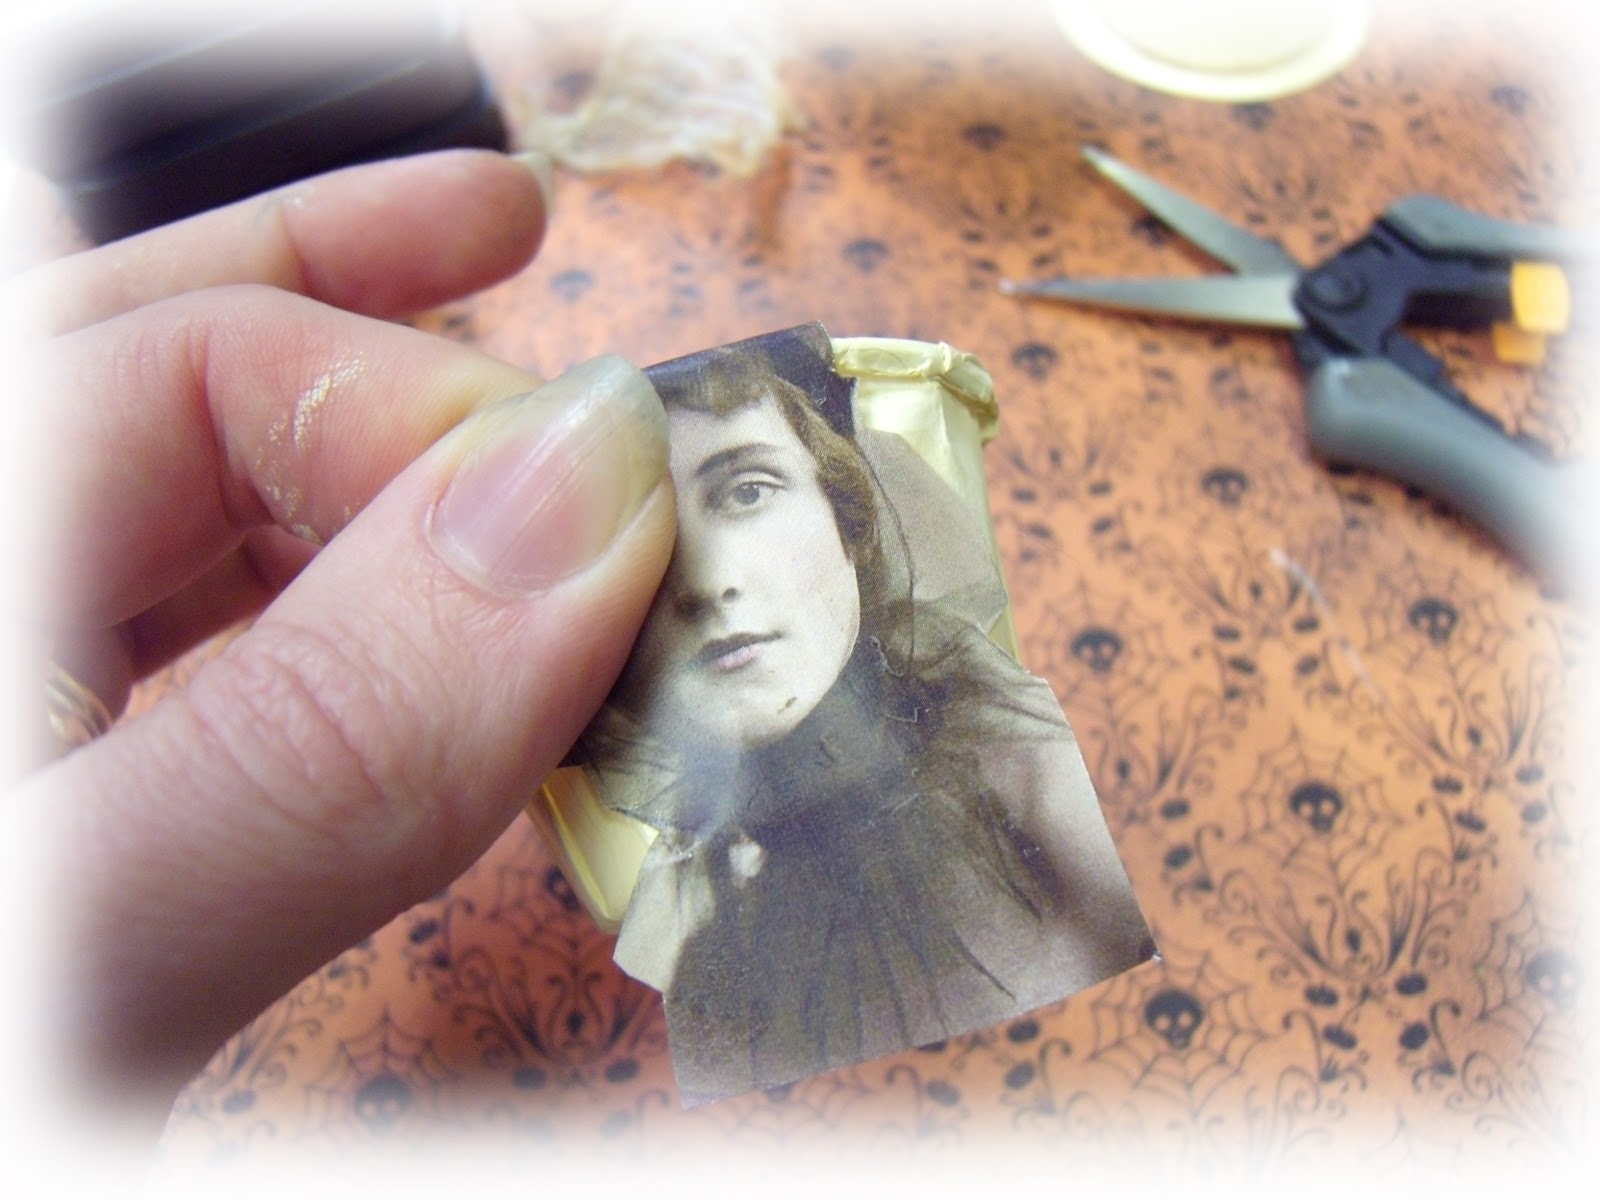


Now pull out some things to make the witches hat special.  I picked tan seam binding and a rhinestone piece.


Glue them in place.


Next I attached my grunged up cheesecloth, it kinda looks spider web like.


To make sure that everything is nice and sturdy, cut a circle out of foam core the same size as your witches hat base.


Do Not Attach the hat to the foam core (yet)


I hid the foam core by covering it with a tan ruffle and other goodies.

 
While that is drying lets get the hinges going on the nut cup.  This is the tricky part, but actually it wasn't that bad.
 

I started by shoring up my nut cup, adding two strips of foam core where the screws of the hinges will go.  I used small dollhouse hinges that I found in the wood working section at Michael's


Mark where the screws will need to go and start your hole with an awl or other sharp object.

 
Set the cup aside and now determine the placing on the hat.  The easiest way to do this is to temporarily tape the hinge onto the nut cup (in place) then place your hat on top.  Carefully (without moving the hat) reach in and grab the hinge and hat and pull them away from the cup.  Voila you know where you want your hinge and can mark the spot.
 
 
The order is important, you must attach the hinge to the top (foam core piece) first.  Don't worry if the screws pop out of the foam core a bit, they can be trimmed and remember we still haven't actually attached the hat yet, so all holes will be hidden.
 

Place the unattached hinge on the outside of the nut cup and screw it into place, since you pre-poked the holes this part will be easy.

 
Here is what the base will look like when it is hinged. 
 

Now it's time to finish it all up.  Attach your Witches Hat to the base with your favorite glue, I like Rubber cement.


All done!
Closed

 
And open
 
I hope you have enjoyed this tutorial and find it helpful.  Please feel free to ask any questions.  Thanks so much for reading my blog. 
 

Tuesday, September 4, 2012

Art Share ~ Sandy of Altered-Artifacts

Sandy of Altered-Artifacts put together this wonderful digital collage image and then added bits of red puff to areas for the Circle of Friends Alice in Wonderland Chunky book. 

Monday, September 3, 2012

Altered Cabinet Card Swap Announcement

I am super excited to announce my first ever blog swap, an
 
Altered Cabinet Card 
&
Pocket
Partner Swap
 
 
Alter a Cabinet Card and create a pocket/envelope for your partner.  The pocket can be made out of anything (fabric/paper) and be any size/shape as long as the Altered Card fits inside of it.  Then Join me and the other participants for a blog hop featuring our creations on October 25th.  Don't have a blog, flicker is fine.
 
Whats a Cabinet Card?
The Cabinet card was the style of photograph which was universally adopted for photographic portraiture in 1870. It consisted of a thin photograph that was generally mounted on cards measuring 4¼ by 6½ inches. (For this swap larger is fine but nothing smaller)
 
Where can I get Cabinet Cards?
Antique/Junk stores
I also have some
 
Important Dates:
Sign ups end September 15th
Partners Assigned September 15th
Mail by October 15th
Blog Hop October 25th
 
How to join
send an e-mail to me at ouztshay@gmail.com
with the following information
Name, Address, e-mail and blog/flicker address
Theme choice:
1.  Traditional Halloween (oranges, purples, blacks etc.)
2.  Vintage Halloween (creams, browns, a bit grungy)
3.  Fall/Autumn

Here is a Sample of one that I have made that would fit into the Vintage Halloween Theme


Thanks so much for considering joining my swap.  I am very excited, please feel free to share this and the badge with your friends. 


Glitter Tart Designs

Art Share ~ Margie of Paper Play Time

 
Margie of Paper Playtime created these pages for the Circle of Friends Alice in Wonderland Chunky book. 
 
They are bright and happy just like the movie, and make a great addition to the book.  Most of the books start off with her page. 


Sunday, September 2, 2012

All Hallows Eve Altered Cabinet Card

 
Recently I joined a wonderful group, blissfullARTswaps.  Many of the artist I follow are members and I am thrilled to now be swapping with them. 
 
 
As always I was a bit apprehensive to join in, fearing I might not "make the cut."  The first swap I joined is an All Hallows Eve Altered Cabinet Card.  I had never altered a Cabinet Card, in fact, I didn't even really know what one was.  The ladies of the group were great, sharing all their knowledge and even mailing me some cards.
 
 
Here is what I created.  I decided to dress up my image feeling that she already had a witch like quality to her, kind of a mean headmistress look that could easily be called "witchy."
 
 
I started with layers and layers of black seam binding so that I could hide things between the layers.  I made the spider and then a 3D witches hat. 
 
 
Some coordinating buttons, lace and flowers finished it off.  And I really like the way she turned out. 
 
 
One of my favorite things to do is to package things in a lovely way.  So I decided to make a pocket/envelope for the card.  Recently a wonderful swapper with MAMA sent me a gorgeous vintage crochet piece.  It was a bit large but perfect colors for this. 
 
 
I sewed it into a pocket, added some trim, a ruffle and coordinating flowers and ribbon and voila a perfect pocket for my Altered Cabinet Card.
 
 
I had so much fun with this new to me art form that I have decided to host my very first blog swap.  So be looking for my announcement in the next few days. 
 
Thanks for looking.