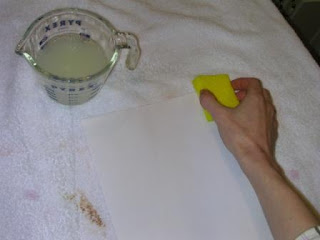
Prepping...the night before the fun
The very first step is to prepare your paper...you do this by mixing Alum into water and spreading it onto your paper. This allows the paint to stick. I do this first so that my paper has plenty of time to dry and then get ironed out (placed under a gigantic cook book) before I use it.

 By the way, this stuff will really dry your hands out so put lotion on right after and keep it on...or wear gloves...i didn't think of that...
 Carragean is what is used to make the size...a heavy liquid that the paint will float on so designs can be swirled and combed into the paint and then lifted easily off with the prepared paper.
 Don't worry it doesn't hurt your mixer...

This is what the Carragean will look like after blending...it will be very bubbly and feel heavy.
 Don't worry it doesn't hurt your mixer...
Day 2...at least the way I decided to go about the Marbling process...
My size has been in the fridge overnight so it is all set to be poured into the baking sheet. Set up a workspace that you don't care about messing up and gather all your tools. My choice, the garage with a stolen towel (I didn't steal it DH did) on the table top (didn't really care about the table either)
I didn't want to spend to much money on paint so I mixed most of mine in small plastic cups.

After your size is poured and your paint mixed make a few brushes and get to it. 

The real mess comes when you start to put your paint onto the size...be prepared to have splatter everywhere...which was kinda fun :) This step you kinda have to find your own groove to...I found that tapping the brush either under or on top of the bristles worked best. If you are using black, always start with that. From there I went darkest to lightest. Spreading the paint is the most time consuming and to me nerve racking step of marbling. Depending on the design you select you can be criss crossing and racking for a while...and you know I choose some complicated designs...never the one for the easy road... The marbling tray will look something like this before placing the paper on it.
 Once all is said and done your work space will look something like this, even if you are a neat freak like me.
  The finished sheets drying...don't worry they flatten out very easily!
 Spreading the paint is the most time consuming and to me nerve racking step of marbling. Depending on the design you select you can be criss crossing and racking for a while...and you know I choose some complicated designs...never the one for the easy road... The marbling tray will look something like this before placing the paper on it.
 Once all is said and done your work space will look something like this, even if you are a neat freak like me.
  The finished sheets drying...don't worry they flatten out very easily!

No comments:
Post a Comment