Tuesday, November 15, 2011

Art Share ~ Lynda Roddy Ozzauto


Today I am sharing another wonderful tea pot created for Alpha Stamps Yahoo Group Alice's Tea Party Swap that I'm hosting. 

This one is by Lynda Roddy Ozzauto and I love the black and white theme she used.  The hears are all puffy also.

Make sure you stop by the Alpha Stamps Gallery to see all of her wonderful teapots and the other participatns.  

Monday, November 14, 2011

Art Share ~ Kimberly Laws


Today I am sharing another wonderful tea pot created for Alpha Stamps Yahoo Group Alice's Tea Party Swap that I'm hosting. 
 
This beauty is Kimberly Laws of Art Joy Stuff and the photo just dosn't do it justice.  I love how she mixed paper and fabric.  Kimberly also sent me the sweetest hostessing gift, a decorated matchbox filled with goodies similar to those she used on her teapot (I'm a bad blogger and don't have a picture, maybe later).


Make sure you stop by the Alpha Stamps Gallery to see all of her wonderful teapots and the other participatns.  

Friday, November 11, 2011

Large Projects, Don't Fear Them! ~ Journey With Me, Day 3


Welcome to Day 3, if you missed Day 1 or Day 2 please check them out. 

Again, I start by consulting my plan. 


Then I gather everything I need, for today I want to finish stamping all my images, so that's 2 more stamps and then I want to add some details. 


Again I use my trusty stamp possitioner, please see Day 2 for a review of how to use one of these. 


All the caroling Dogs stamped :)  Now onto the Cats.


This goes fairly quickly, but what you want to be careful of is not getting careless, it can seem very mundane and easy but that's when you drop your stamp and all of a sudden you are really glad you are making a few extras. 


All my images stamped, at least that's what I thoughts, right now I am not in love with this, but it still has a few steps to go so we will see, I've got some idea's brewing on how to add to it. 


I'm going to add a bit of pop to the Dogs and Cats by painting their collars/bows in shimmering H2O's that match the background.  They will stand out thougth because the background is a mix of 4 colors so none are overly prominent. 

I lay out a bunch so I can go quickly, start at the top going the direction you are comfortable working in. 


See how fabulous that Orange is and to think that's the base color on the background. 


I decide to go with the Old Rose for the cats.

 And yes, I'm still working on these.  Alas, today my sweet husband was helping me to a bit of cleaning and he vacuumed up a few off my desk top :(  He was trying to vacuum up all the wood chips from another project I'm working on.  So I've been set back a few but no big deal I have plenty of time.

Well, that's it for today.  And it will be for a little while, I need to go buy my organza and I'm waiting for my coupon to be good.  So I'll see you again in a few days.

Art Share ~ Cecile Palou


As I mentioned yesterday, wonderful tea pots for the Alpha Stamps Yahoo Group Alice's Tea Party Swap that I'm hosting have started to arrive.

This is the Front of one of Cecile Palou's, make sure you stop by the Alpha Stamps Gallery to see all of her wonderful teapots and the other participatns.  

See you tomorow with another fabulous tease!  You know you wish you had joined.

Thursday, November 10, 2011

Art Share ~ Carol DuBois


Wonderful tea pots for the Alpha Stamps Yahoo Group Alice's Tea Party Swap that I'm hosting have started to arrive.  For the next few days I'll feature each participant here on my blog but make sure you visit Alpha Stamps Gallery to see all the pieces.


This is one of Carol DuBois tea pots, I just love how she added a book page to hers!  

Tuesday, November 8, 2011

Large Projects, Don't Fear Them! ~ Journey with me Day 2


Welcome Back, so glad you could join me again.  If you missed Day 1 or need a review of where I am Day 1 can be found HERE

To start I review my plan and make any changes I dreamt up (and I did dream one up, I don't think my "O" is prominent enough so I have a plan to add an even bigger one now).


During the drying process my pages rolled, no big deal.


I give them a quick ironing.  I stack a bunch of them together to make this go faster.  Make sure you move your iron constantly you don't want to burn your paper and be careful when you move the paper off the ironing board, it is HOT!


All better!


Remember these?  Still working on them so I get some more going.  Right now I am making about 5 a day which is perfect.


So I am ready to start stamping my images onto my paper.  Let me introduce you to a tool that I would be lost without, my Stamp Positioner.  Mine is old and I couldn't find a link but a quick Internet search will pull up a bunch of different ones.  If you have never used one before then get ready to be amazed!


Position the clear acrylic block (not your stamp, the thin portion that comes with the positioner) into the corner of your T-square (many are just L shaped).  Next butt your stamp corner up to the corner and stamp your image onto the clear plastic.


Here is a picture with my stamped image on the positioner.


Next position the stamped image onto your paper and then fit in the T-square.  Remove the clear stamped image, be careful not to bump the T-square.


Now stamp your image onto your paper using the T-square as a guide.


Voila! 

I'm done for the day, today I have a bunch of chores and need to hang with my oldest kido but if you still have time you can of course stamp more of your images.  Just make sure that you don't get burned out on it. 

See you next time!

Twinkle Twinkle little Bat


The Alice's Tea Party Swap (An Alpha Stamp Yahoo Group Swap) pieces have started to arrive so it's about time that I shared my final piece with you.  This one is my favorite!


The background is all glitter!


And I made crepe paper rosettes and added glitter.


Couldn't leave off the wonderful little mouses song, Twinkle, Twinkle, little bat...


And finished it off with some gold stars. 

This one I'm going to have a hard time parting with but wait until you see some of the creations the swappers came up with, I'll start posting those soon.

Monday, November 7, 2011

Large Projects, Don't Fear them! ~ Journey with me Day 1

Recently I was asked if I would be interested in joining an ABC Christmas Book Swap.  Initially I flipped out thinking about having to make 27 pages but then I realized it's not that difficult and I can do it without sacrificing my style.  I know that the finished product will be well worth the work I put into my page as well.  HERE is the last ABC book that this group put together.

Before I got started I kept hearing "how do you get so much done" running through my head so I thought I'd share my process with y'all and hopefully it will help you not feel so daunted when confronted with large projects and that you will be able to join them.  They are so rewarding. 

So join me on my journey.


I start all my projects, big or small, in this journal.  I used to use bits of paper but they would go missing or get cut up into something else.  So grab yourself something you won't destroy or loose (easily) and lets get started.


As I mentioned this is an ABC Christmas Book I'm contributing to.  My letter is "O"
I started by writing down everything that I could think of associated with the letter and Christmas.  Then I started pulling things together that I own. 

The O Christmas Tree stamp is one of my favorite holiday stamps, it's a Repeat Impressions, and it is also what inspired my design. 

I made notes of all the things I wanted to do, step by step, and very detailed.

The most important thing to keep in mind during this stage is that you will be making a lot of the same thing, think out of the box, find ways to keep things simple without sacrificing your style (or having to purchase a bunch of things).  I tend to cut a lot of detailed images out, that is not something feasible for a project this size so I concentrated on how to keep my look while directly stamping onto the paper. 

When I was done with that part it was onto spacing.


The pages of this book can be anywhere from 4x6 to 5x7 so I had to determine what size would work best.  I did this by drawing out a few different sizes and stamping where I wanted my images to go.
 

If you follow me you know I don't use many decorative papers (not that there is anything wrong with them, they would make this a much quicker process), so of course I am making my own background (I chose one I am very familiar with that doesn't take much time). 

Then I cut out all my paper, making sure to cut out a few extra because inevitably I will make a mistake or like some more than others.


The other thing I decided to get started on were some embellishments I am making.  They will take time since there are so many of them.  If you start this right away it won't seem so daunting.  Also making your embellishments saves you money.  I'm doing some of my Paper Clay stars, my other embellishments will be fabric, ribbon and brads. 


I was on a roll so I decided to do my background.  However here is a good stopping point for the day if you are stressed, have other things to do or just don't feel like it. 

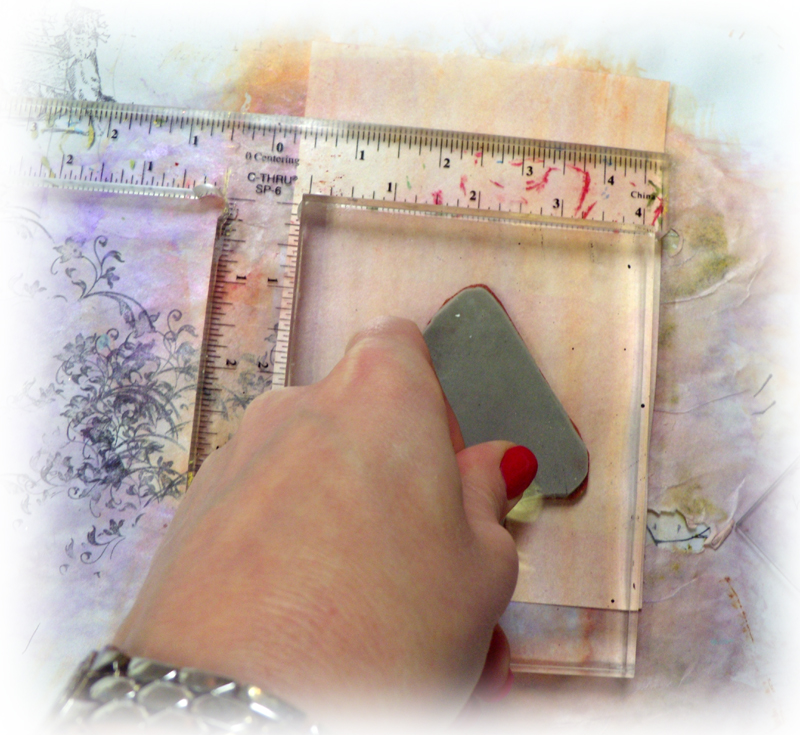
Please excuse the ugly gloves, my fabulous Sister in Law treated me (unexpectedly) to a manicure this past week and I didn't want to ruin my purdy nails. 

Okay so for my quick background I am doing a Sparkling H2O background.  I selected 4 colors (all starting with the letter O) Orange, Orchid, Old Rose and Oyster, and I am sponging them on one at a time. 


By the time I was done with all 27 in one color the first ones I did were dry so this went really fast (especially with my little helper who switched them out for me). 

I wanted the pages to dry completely so I stopped here.  Tomorrow I will start to put the images on so come back then!

Hope this helps you and inspires you to join some of those more daunting swaps you oggle.  Also if you are interested in joining this swap there are still a few letters open, just leave me a comment and I'll get you in touch with the organizer.

Sunday, November 6, 2011

Music & Cupcakes for a Year! ~ Art Share

This past month I joined in the Circle of Friends Surprise Swap. Sandi, our fearless leader, is the woman behind the idea and organizer. For those of us that sign up we are assigned one person to send an item of our choosing to, keeping our identities secret until the gift arrives.   


Friday I pulled these lovelies out of my mailbox and I swear you could hear me squeal all the way across the ocean!  Sandi, yep our fearless leader, was my secret partner and she sent me a combination of things I have loved since time began. 

A 2012 Calender of cupcakes, and oh they are so pretty, a CD that she burned herself and the homemade item is a fabulous CD pocket to keep it in. 


The phrase she stamped is perfect
"I get by with a little help from my friends. ~ John Lennon" 
and the CD has the following songs
Any Dream Will Do
Beautiful Day
Best of Friends
Blessed
The Gift of Love
Live Laugh Love
Live like you were dying (this one always makes me cry)
Over the Rainbow
Sunshine and summertime
You'll Be in My Heart

The Girls and I immediately popped it in the player and ogled all the wonderful pictures in the Calender.

Thank you Sandi, this was the best surprise ever!

Tuesday, October 25, 2011

October Surprise ~ Circle of Friends Swap


The Circle of Friends does a monthly surprise swap, you send one item of your choosing to your secret partner.  This is the first month that I have taken part and I had a great time creating this little piece for my secret person.


It started off as a bottle cap magnet with one of my favorite Halloween themes, Mr. Edgar Allan Poe.


Then I decided it needed something special to whisk it away to my secret partner.  When a small fabric bag crossed my path I snatched it up and died it a soft grey.  Then I decided to add a flower. 


I altered two straight pins to affix the flower to the bag.  So my partner can take it off and use it elsewhere. 


And finally I stamped the back with spiders.  I hope she likes it, I'm off to drop it in the mail.