Monday, July 28, 2008

Alpha Stamp Fabric Cocktail Napkins


This week over at One Powerful Hour the challenge was "unfinished Projects" We were to work on them for about 45 minutes and then clean up.

Unfortunately this theme did not go over very well...I guess I am the only person with unfinished projects littering her work table. Oh well.

I decided to work on my Cocktail napkins for Alpha Stamps. A while back Leslie sent me these fabulous fabric collage sheets to "test" So far I have washed the images a couple different ways, tested iron temperatures, how to sew them and a few other fabric essentials. And let me tell you what...no matter what mistakes you make these Collage sheets live up to their fine name.


I made the mistake of washing one of the sheets before ironing/heat setting and they didn't even fade that much! Now that is amazing!

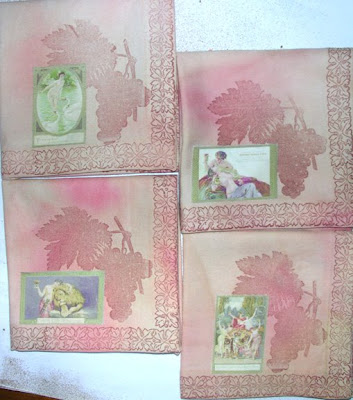
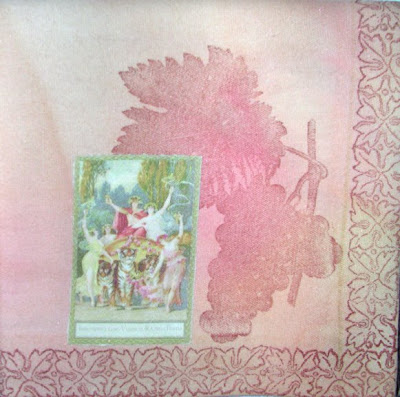
Okay back to the napkins. I decided to use 4 small images of different wine posters circa 1920s (???) They are very detailed and unfortunately that was lost with the photographs. The stamping is all done with a dark brown fabric ink.

Since the goal of One Powerful Hour was to get as much done in an hour as possible, I did not finish the napkins. I still need to sew them shut and I want to add a few seed beads in between the leaf pattern on the section of the napkin that will be used.

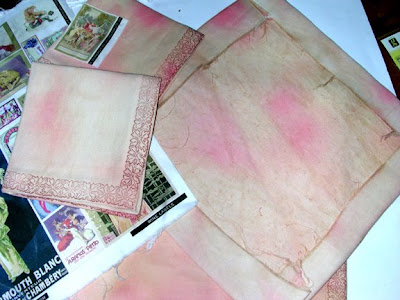
the first picture is what stage the napkins were in before I started the challenge. The second is where they were at the end of the hour and the third is a close up. I had a lot of fun with this challenge and feel like I accomplished a lot even though I am not finished with the napkins. I am sorry that more people didn't join. A lesson learned.

The upcoming theme this week is Christmas in July...I hope that you will join me for that this Thursday.


I hope you enjoy viewing my napkins...I can't wait till they are done so that I can "test" use them :)

Friday, July 25, 2008

Soul Journal Days 11 and 12

So these past two days have been dedicated to finishing up "Our House" It is funny how when I started this page that I was very reluctant and not pleased but I had an absolutely fabulous time adding my collage elements. Sarah actually told us not to add to many but I just could not stop.

Here was what she wanted us to do:

Today we are going to collage over some of our drawings. You can use patterned papers, tissue paper, dictionary paper, anything you can think of! Rip papers to fit windows, roofs, edges of buildings, etc. I attached mine with Matte gel over and under my papers but just use what you've got. Go over your outlines with a permanent ink pen.


My favorite thing that I did is the whole punched elements I added to the sky. All I did was dump my whole punch onto a glued section of my page and press down, once it dried I wiped away the extra scraps and this is what i was left with. I really love the texture it created and I couldn't wait to see what it would look like with paint over it, which is what we did on day 12.


I loved how Sarah painted her house but as I have said before this particular page is way out of my element so paining scared the begebies out of me. But I threw caution to the wind and added my color...

For the sky I mixed a blue acrylic paint with some blue pearl ex powder so the sky does shimmer a bit. I also put the paint on in swirls...I wanted the sky to look like it had some movement.

For the right had page I painted the buildings with a silver paint watered down. I pressed the paint with a paper towel so there is a bit of a pattern to the paint. It is really neat in real life.

And for "My House" I mixed some brown paints with a reddish toned pearl ex powder, I was hoping to get a brick color. It however did work and looked very flat so I hand drew some bricks with my brown sharpie and then sprayed the page with a gold glimmer mist and a walnut ink. It added a lot of depth which is what i was going for.


Unfortunately it was really hard to get a good close up, detailed photo of the paint effects. Here is the best one I could get. The flash on the camera really bounced off of my door which is made out of glossy paper with alcohol inks. But you can see the glimmer mist gold and some of the Walnut ink.

I had a lot of fun with this page. it is amazing how my feelings towards it changed over the days. I hope you enjoy!

Wednesday, July 23, 2008

Soul Journal Day 10

Today Sarah had us do the following:

Today we are going to recreate our home. This can be where you currently live or a home from your past where you felt happiest and safest.

So I grabbed my all purpose brown sharpie and went at it. I decided to go with a very basic house shape b/c drawing is not really my forte and on the right hand page I drew a city scene, mainly b/c I felt more comfortable with that type of drawing.


Next Sarah had us make a pocket out of a brown paper bag. I use brown paper bags all the time, mostly to wrap books that I am mailing but it looks like I may have a new use. Sarah briefly said she makes entire books out of paper bags...this intrigues me greatly...must look into it further.

And that was all for Day 10. She told us not to get to detailed in our drawing...thank goodness :)

3 x 3 Summer Collage Swap

Here is my latest work for another fabulous Lenna Andrews hosted swap...

Requirements: Make 6 Itty Bitty collages. They must be 3”x3” with a theme of summer. Create your Itty Bitty collages on card stock, art board, canvas board, mat board -- or use fabric if you prefer. Your collages should be fairly sturdy no matter which substrate you use as a base. The theme is SUMMER. Use images (or not) as you wish. Add paint, paper, and/or fabric. Embellishments including sewing, beading, metal and other embellishments are most welcome. This is a Mixed Media collage and anything goes!

To see the titles of the pieces and more detail please look at the slide below.


Monday, July 21, 2008

Soul Journaling Day 9

Today Sarah had us go back and revisit the "Magazine Inchie" page.

She said we were going back because

The reason I am working back and forth is that nothing I ever do in this journal will ever really be what you may consider “Finished”. I want it to be constantly growing and changing. As new insights and ideas are awakened in me I want to be able to go back into my journal and add to it. Give yourself permission to take on another page or another 10 pages all at the same time.


She asked us to paint over the images with a lighter shade of paint. I selected a Lemonade yellow which ended up looking more like a cream. Unfortunately I wish I had not put any additional paint on my pages and just doodled, which was her next request.

When I picked up my marker to doodle I forgot that Sarah wanted us to do some specific things

Now grab a pen or marker and:
Write 8 words describing your pictures.
Circle one picture
Draw a messy square around four
Draw a dotted line around two
Draw a broken “stitch” line around one

Opps...but I like my doodling so I am all good with not following the instructions here...i let the page and my mood take me where it did.

Because I added sand to my acrylic paint days and days ago it was hard to write and doodle. i just had to let go of the neat look I normally go for and let the bumps in the paper take the marker where they did.

Let's Go Fly a Kite


The challenge this past Sunday over at Gothic Arches is:
This week our theme is “Handwriting” which was selected by our hostess Dymphie. Use your own handwriting on the arch, paint a few letters, calligraph a quote (i would looooove to see that). I don’t like my own handwriting very much, but i like to use it in my art-work, it seems more my own when i do so.

We want to see your handwriting on your arches this week!

You can see more of Dymphie’s beautiful artwork on her blog:http://papierenavonturen.blogspot.com/
At First I said "NO WAY" I use stamps I can't do that. But then after working on my Soul Journal I realized that I can and that adding my own touches, be them my handwriting or just some doodling, really makes me feel good.
So, here is my Gothic Arch with handwritin. I copied down the words to "Let's go Fly a Kite" Also, I made the kites without any stamps. This is my very first piece of art that dosn't have collage images or stamps used and I am very pleased with it.

Sunday, July 20, 2008

Soul Journal Day 7 and 8

Well, Day 7 was a ruff one for me...underneath all the tape you see Sarah had us do the following...

Get comfortable, take some deep breathes, clear your mind and then fill at least both pages with the prompt “I forgot to tell you…”Be as honest and open as you can knowing that we are going to cover this up and no one will ever read it. If you get stuck rewrite your prompt “I forgot to tell you…”


Before I was done writing I was crying...life can sometimes come crashing down on you and you can hold it in and then given the right prompt it can explode out of you...and that is exactly what happened.

Before Day 7 was over we covered our writing with Tape. I used a few different kinds, a metal tape, Duct tape that looks like camouflage, masking tape and two different fabric tapes, the black on with numbers and then a jungle one with leopard print and flowers all over it.

I also did not cover all of my writing. I wanted the prompt Sarah gave us to show through so there is no tape over "I forgot to tell you"


Day 8 was all about dressing up the tape. We started by sanding the tape in all different directions...this was to help the paint stick.

Next we dry brushed Gesso on...and guess what, this time I had Gesso to use. So this is my first time using my Gesso I thought I used a good amount it did cover the non fabric tapes well. I think the fabric tape actually absorbed or repelled it...I'm not 100% sure.

Oh, before I started painting I circled the prompt from yesterday to it stands out a bit more.


After the Gesso dried we sanded again and then used acrylic paint to paint over all the pages. I found two red paints that were fairly close in color and once again the fabric tapes resisted or absorbed the paint.

Before finishing I sanded one last time to bring out more of the silver tape.

NOTE: If you are going to use a fabric tape be very careful when sanding, the sand paper catches the edges and pulls up the tape very easily.


this is a close up of two of the fabric tapes. there is masking tape slightly above the number 1. See how much more paint covered it. I promise I used the same amount of paint everywhere.

As homework Sarah wanted us to press a flower. Well, it is just to darn hot here for flowers. The only one i could find is a gigantic magnolia blossom that looks like it has seen better day's, I hope it works. I had to cut a lot of it off in order to get it to lay flat. I guess only tomorrow will tell.

Triangle ATC


Sometimes going to the mailbox is just such a joy. Yesterday I received these fabulous triangle ATC's for a swap. HERE are the ones that I sent.
From Left to Right.
Mandy's this one is much brighter in person. I'm not sure what kind of paint she used but it is very flat and has a chalky feel to it. I love how bright it is looking at it makes me smile as big as the little girl is.
Caz's this girl has layer on top of layer on top of layer. I think it is all built on book print then stamped with various flourishes and diamond stamps. The woman I think is part of a larger stamp and has been cut, painted and mounted. The gold wings are just a perfect touch. I can look at this one and try to figure out how she layered it forever!
Donna's is some sort of background paper covered with paint (maybe gesso) Then she layered her darling little girl and stenciled on the red dots. The words giggle and often are highlighted with hand drawn squares around them.
I just love these swap pieces! They are already in my Coffee Table ATC book so that all can see their fabulous pieces!
Thanks ladies!

Friday, July 18, 2008

Soul Journaling Day 6

Today Sarah had us do the following:

Today we are going to cut our magazine images out to be small squares. Don’t get caught up with the perfect measurement but they should be approximately 1x1”. If you want to you can measure the first one to get an idea of size but eyeball the rest. OK? :)

Now to attach your squares to your page. Use a grid pattern arranging the images in any order that you like. If your journal is small you may not use them all. If your journal is big you may have more white space and want to add a few more squares. I am going to attach mine using matte medium under and over the images to protect them. If you don’t have matte medium, you can use any glue you have handy.

You will be amazed how beautiful these tiny random images start to become as you place them on a page together. Do you see any themes happening? Do you see any stories? Play with the arrangement and see how themes can change.

I had a really hard time free handing the 1 x 1 squares...mainly because I spent years and years working with very precise measurements. But I think I let go quite well for me at least. I cut out a 1 x 1 inch square and put that over the portion of the images I wanted to use and marked the corners then I cut as close to those markers as possible. If I had not been instructed to "be free" I would have pulled out my exacto blade and my clear ruler and gotten them all perfect.

since "free" was kinda the theme today...at least that is how I viewed it. I decided that perfect grids would be boring and I put a few of my squares catywompus. I selected the flower and a favorite color to catywompafy.

I thought when I was cutting them out that I would end up just putting them in order but I did start to play with the arrangements and all but one of the rows I made has a theme.

left hand page
Row 1: Body Parts
Row 2: Squares with writing on them, this includes #13 something I want, #7 something exotic and #3 a chair. My something exotic was a mother of pearl necklace with calligraphy on it
Row 3: Nature Items, this includes #8 a leaf, #11 a flower and #2 something beautiful which was a bird cage being used as a flower holder.
Row 4: My no theme row but he number I chose I did put in the #12 spot

Right hand page
Row 1: Animals, this includes #23 a butterfly which I replaced with a dragonfly, #14 something you own and #12 a bird...this is my favorite image
Row 2: Things that are red, this includes #6 something comfortable, flip flops, #9 a color you love and #4 something red
Row 3: This is all the letters R, A and T
Row 4: Things that are blue, this includes #17 something that tastes good, #5 something blue and #10 a pattern.

The final image is our homework, she wanted us to find all the tape we could that was not clear. I am waiting for DH to get home to tell me where he hides all his colored electrical tape...I know he has it after all he is an Electrical Engineer...

Thursday, July 17, 2008

Soul Journaling Day 5

Today's soul Journal project was a two part er...

First Sarah had us:

I want you to do a light wash of a darker color of Acrylic paint over both pages. To do a wash just add water to your paints. I have done mine here in dark brown (AKA Raw Umber) but you may want to use dark purple, black, dark blue, etc.

I thought about doing the dark brown because Sarah's turned out so lovely but I am more partial to green so I selected a Deep Forest Green.

I did learn a hard lesson though. My color wash leaked through to some of my other pages because I have a "holy" journal. it got all over my Soul Armor page. I am okay with it...Athena is just a little bit green it made her look like moss has been growing on her for a bit. It did however mess up the flowers I had printed out on the photo paper. I think I can fix it but i am going to wait until it is all dry.

Here are my pages color washed before I dabbed them with a dry paper towel. See below for a photo of them dabbed.

Our Second task was to rip out magazine pages with the following images on the. we were not suppose to be concerned with size, just as long as we liked something about the image.

1.A smile
2.Something beautiful
3. a chair
4. something red
5. something blue
6. something comfortable
7. something exotic
8. a leaf
9. a color you love
10. a pattern
11. a flower
12. a bird
13. something you want
14. something you own
15. the letter R
16 something that smells good
17. something that tastes good
18. A circle
19. the letter A
20. An eye that’s the same color as yours
21. a hand
22. the letter T
23. a butterfly
24. a number

I think I found everything but the butterfly which i replaced with a dragon fly...kinda the same thing...I can't wait to see what we are doing with these images.

Some of my torn pages can be seen behind my color washed journal pages. can you guess what goes with what???